
Let me ask you several questions:
- Do you use Facebook to advertise offers from affiliate networks?
- Does your affiliate network lack support for conversion pixels?
- Are you dreaming of using a stable and cookie-less S2S postback URL method to report conversions from 3rd party offers to Facebook?
If so, you’ve come to the right article.
The team behind Voluum tracker has struck again with a solution that allows you to get conversion information from an affiliate network via postback URL and then pass it to Facebook Ads (now Meta Ads). This solution even allows you to distinguish between various conversion types! No need for cookies, pixels, and all that.
Reliable server-to-server connections FTW!
Backstory
Facebook famously uses its pixel technology to track conversions. It’s a good solution for advertisers that are product owners or at least have control over the offer web pages. This allows them to implement the Facebook Pixel into the offer page’s code.
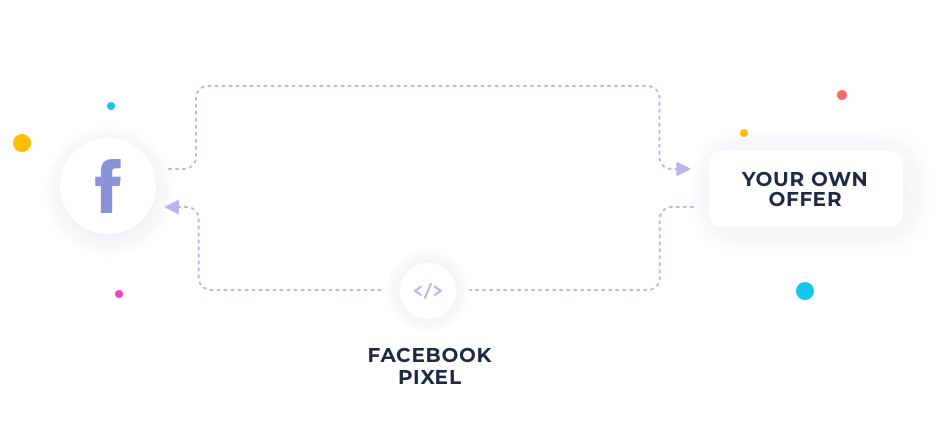
The pixel reports conversions straight to Facebook Ads (now Meta Ads).
This approach automatically excludes most affiliates who, by definition, advertise 3rd party offers from affiliate networks that don’t support conversion pixels.
Voluum for years has been filling the gap in reporting by allowing affiliates to get visit and conversion data in one place. You could use offers from affiliate networks that were using postback URL to report conversions to Voluum.
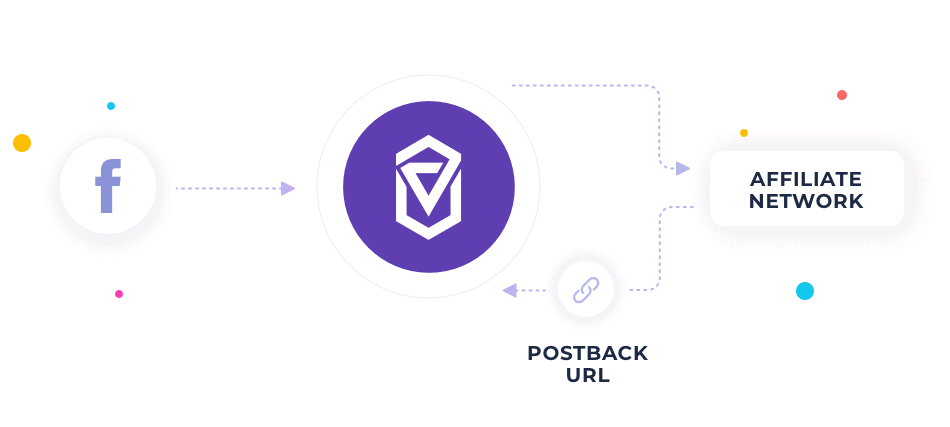
This scenario doesn’t allow you to pass conversions to Facebook Ads (now Meta Ads).
The only way to pass conversions from Voluum to Facebook until now was to use a conversion pixel to track conversions coming from offers. This means that you either had to find an affiliate network that supports pixels (a very few of them do) or use your own offer.
Once you have set up passing conversions from this offer to Voluum with Voluum’s conversion tracking pixel, you could then use the Pixel redirect URL option in Voluum as described in our knowledge base.
The setup would look like this:
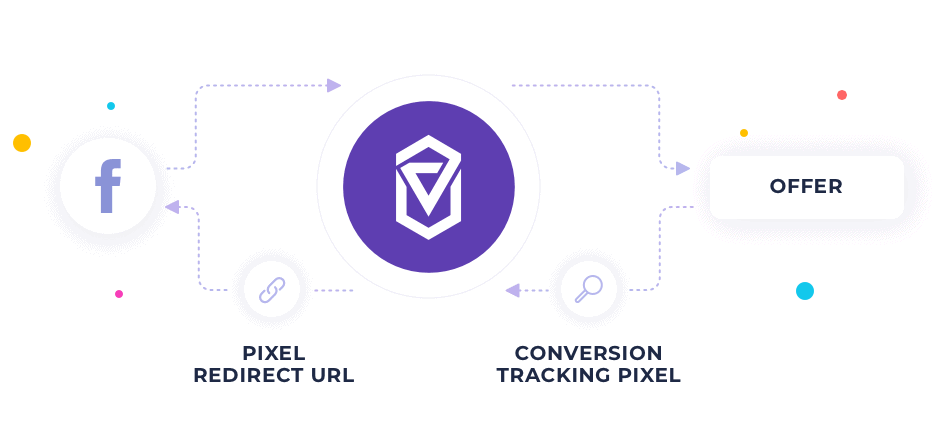
These were your only options.
If you don’t like the cookie technology, don’t have your own offer or don’t work with an affiliate network that supports pixels, you couldn’t pass conversion data to Facebook Ads (now Meta Ads).
This all changes now.
Passing conversions to Voluum using server-to-server postback URL
The solution that Voluum has developed uses the integration of both Voluum and Facebook Ads (Meta Ads) accounts.
The integration means that you will use the most reliable connection between two platforms – an API connection – to pass information between these platforms.
But there is a caveat that was hard to overcome: Facebook accepts conversions passed via API only from verified domains. The verification process is designed to prove to Facebook the ownership of the domain that was sending conversions.
So, like before, this path was closed for 3rd party offers from an affiliate network. Until smart people from Voluum decided to find a way around it.
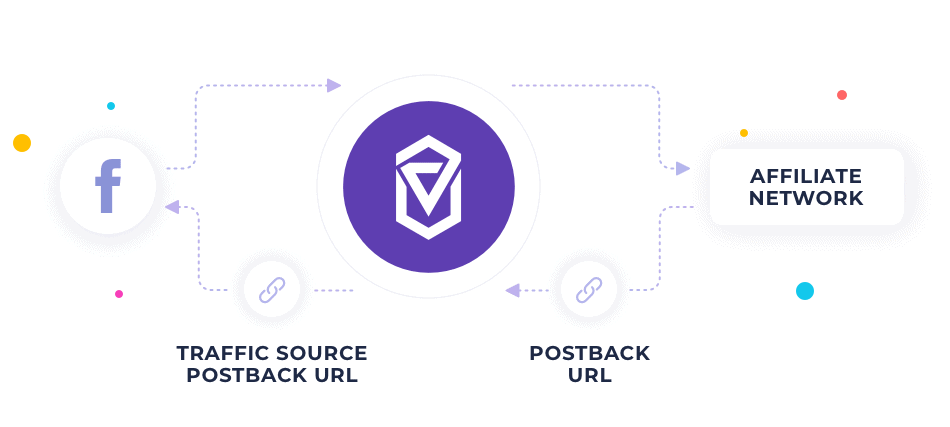
The way this solution works is as follows:
1. You set up conversion tracking with the postback URL of a 3rd party offer from an affiliate network.
2. You verify a domain that you own in Facebook. This can be any domain, not necessarily the one used as a Custom Domain in Voluum.
3. You get the Pixel ID and Conversion API key from Voluum.
4. You create a new integration in Voluum or edit the existing one to provide your domain, pixel ID and Conversion API key.
5. You generate a postback URL in Voluum.
6. You submit this postback URL as a traffic source postback URL in Facebook’s traffic source setup in Voluum.
The whole setup looks like this:
The benefits include:
- Able to use 3rd party offers from affiliate networks
- No reliance on cookie technology.
- Reliable connection
- Distinguishing between various conversion types, like ‘signup or ‘purchase’
Now, let’s go over each step to tell you how to set everything up.
Setting up passing conversions from Voluum to Facebook Ads (now Meta Ads)
1.Set up conversion tracking with the postback URL of a 3rd party offer from an affiliate network.
The process is described in detail in our knowledge base. The key takeaway would be that you should test if your conversions appear in Voluum. Conversions have to appear in Voluum first before they can be passed to Facebook.
2. Verify a domain that you own in Facebook.
Go to your Business Manager Account, then go to Settings / Brand Safety / Domains or just follow this link: https://business.facebook.com/settings/owned-domains/
Add your domain there and choose one of three ways of verifying the ownership of your domain:
- Add a special tag to your page’s main HTML file
- Add a special file to your web page’s root directory.
- Add a special DNS text record in your domain provider’s settings.
Once you do so, hit ‘Verify’.
3. Get the Pixel ID and Conversion API key from Voluum.
Go to the Events Manager in Facebook or just follow this link: https://business.facebook.com/events_manager2/list/pixel
Select the appropriate Pixel and go to its settings. The Pixel ID can be found in the ‘Details’ section. Once you store it in any text editing tool, scroll down to the ‘Conversions API’ section and hit the ‘Generate access token’ link. Copy it and store it in the text editing tool.
4. Create a new integration in Voluum or edit the existing one.
Go to Voluum Automizer / Traffic sources, hit ‘Add traffic source’ and select Facebook. The integration window is comprised of two parts:
The first part allows you to integrate your accounts to synchronize costs, while the second one allows you to pass conversions.
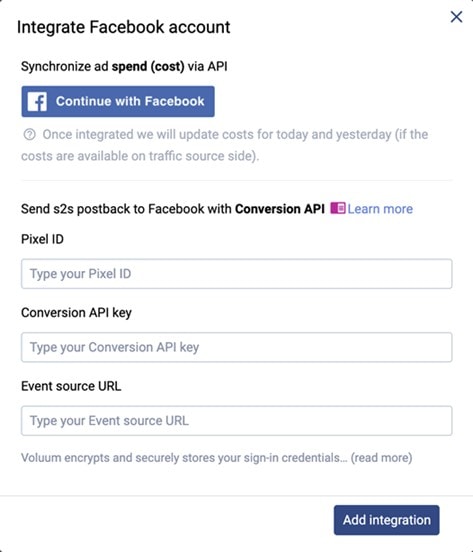
Provide your Pixel ID, Conversion API Key and Event source URL (which is your domain that you have verified in Facebook) in the second part. Hit the ‘Add integration’.
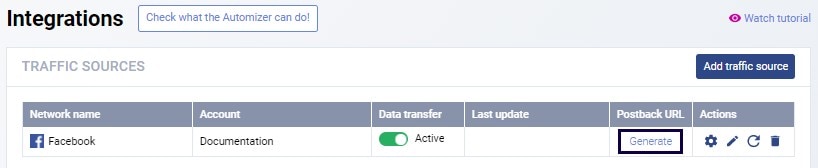
5. You generate a postback URL in Voluum.
Click the ‘Generate’ link next to the Facebook integration.
6. You submit this postback URL as a traffic source postback URL in Facebook’s traffic source setup in Voluum.
When you edit Facebook traffic source in Voluum, add the ‘fbclid’ values as a token and placeholder next to the External ID custom variable.
Next, enable the ‘Traffic source postback URL’ toggle and paste the postback URL there.
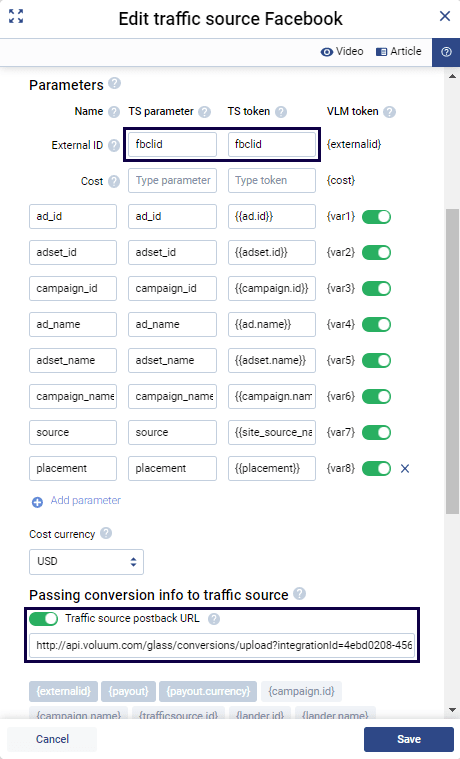
Oh, and disable the ‘Pixel redirect URL’ toggle below, you don’t want duplicated conversions by any chance.
Custom conversions
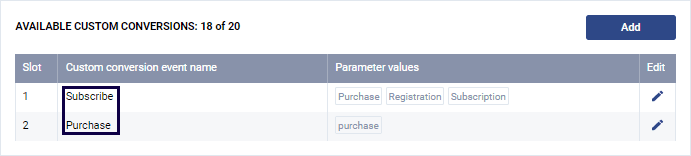
Voluum also supports sending different types of conversions to Facebook Ads (now Meta Ads). You can distinguish between ‘registration’, ‘subscription’, or ‘purchase’ events.
Firstly, you need to set up Custom Conversions in Voluum. The detailed explanation can be found, as always, in our knowledge base. But the long story short is that you have to go to the Voluum Settings / Custom conversions and set various conversion types.
Next, you have to add the affiliate network token dedicated for passing event types paired with the ‘et’ parameter name to your postback URL. Refer to your affiliate network’s documentation but typically this parameter is called something like ‘{event_type}’ or similar. Your affiliate network postback URL would look like this:
https://voluum_dedicated_domain.com/postback?cid={click_id}&et={event_type}
Then, while generating a postback URL, you have to define an event this postback will be generated for. You need to create separate postbacks for ‘registration’, ‘subscription’, and ‘purchase’ conversion types.The conversion names have to be the ones that Facebook uses and understands. You can find the list here.
Lastly, you have to edit the Facebook traffic source, enable the ‘Traffic source postback URL per event type’ toggle and submit all postbacks for each event type.
Conclusions
Note that this solution is available on selected pricing plans. Go to your pricing plan details in Voluum settings and make sure your plan covers this feature. We strongly encourage you to take full advantage of everything Voluum has to offer.


